Estimated reading time: 8 minutes
In this article
How to automate SOLIDWORKS using the API and macros in 5 steps
SOLIDWORKS macros are pieces of code that automate repetitive tasks and processes. For example, hiding all the sketches in a drawing, quickly excluding specific components from a BOM, or completing a series of modeling operations.
In this article, you’ll gain an understanding of the SOLIDWORKS API and learn how to create your own SOLIDWORKS macro.
What is the SOLIDWORKS API?
The SOLIDWORKS Application Programming Interface (API) is a collection of tools that programs can use to interact with SOLIDWORKS.
SOLIDWORKS macros can be written in VBA, Visual Basic.NET and C#.NET. The API is an extension of the programming languages, that provides specific access to the information within your SOLIDWORKS documents, and specific functionality that will allow your programs to control SOLIDWORKS.
Structure of the SOLIDWORKS API
The basics of Object-Oriented Programming (OOP) are prevalent in the SOLIDWORKS API. It’s helpful to think of the SOLIDWORKS API as being a collection of objects (“things”, like part documents, faces, and drawing views). Each of these objects has properties, which provide information about the object. You can find out (get) or change (set) properties, like a name, a parent assembly component, or whether it is visible. The objects also have methods, which are actions that the object can perform. For example, a feature object can move the freeze bar to its location in the feature manager tree, and an assembly document can add a new component.
Because of this heavy use of objects, properties and methods, the process to automating SOLIDWORKS with the API and macros centers around finding and obtaining the objects that you need.
Create a SOLIDWORKS Macro in 5 Steps
This five-step method will guide you through automating just about anything that you want using the SOLIDWORKS API.
Step 1: record the steps you take manually
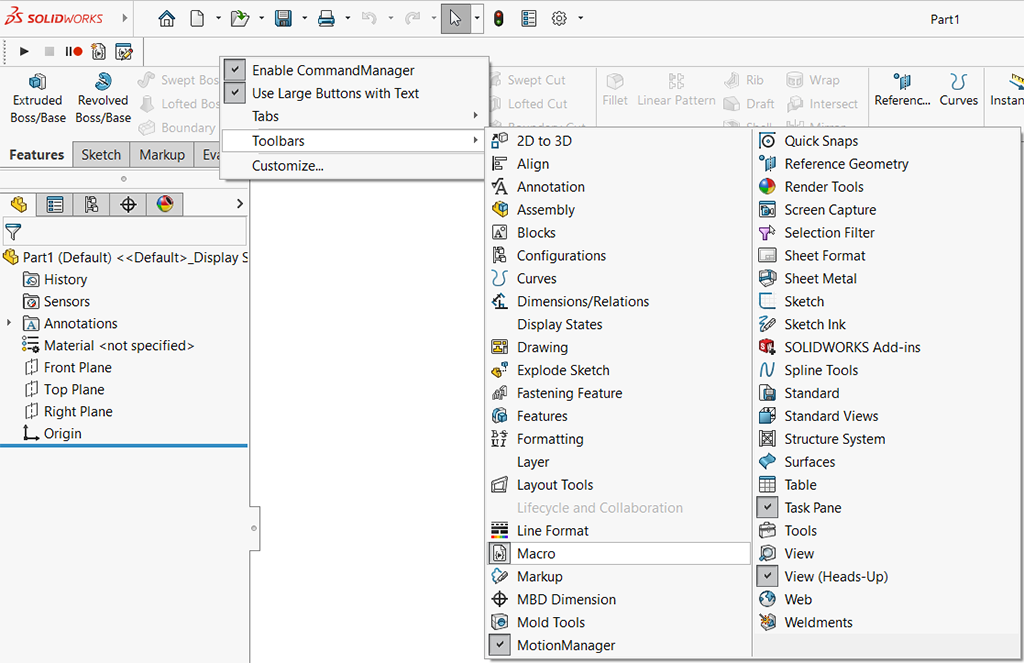
SOLIDWORKS provides a macro recorder that will record tasks that you perform manually in a session of SOLIDWORKS. All you need to do is bring up the Macro toolbar (right-select on any toolbar to see all available toolbars) or go to the TOOLS>MACRO menu to find the RECORD button.

Enabling the SOLIDWORKS Macro toolbar
Enable the SOLIDWORKS Macro toolbar for easy access to the macro recording options.
Then perform the tasks that you want to automate and click STOP.

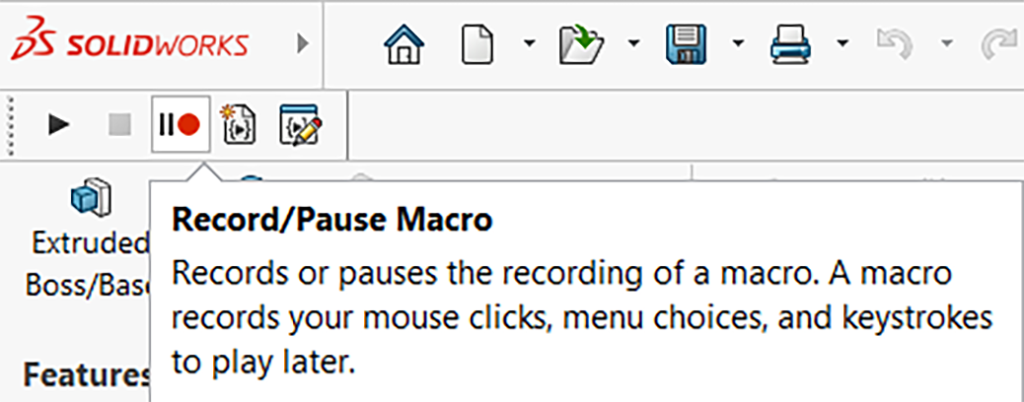
Macro recording options
Start, pause and stop recording and access the macro editor using the macro toolbar.
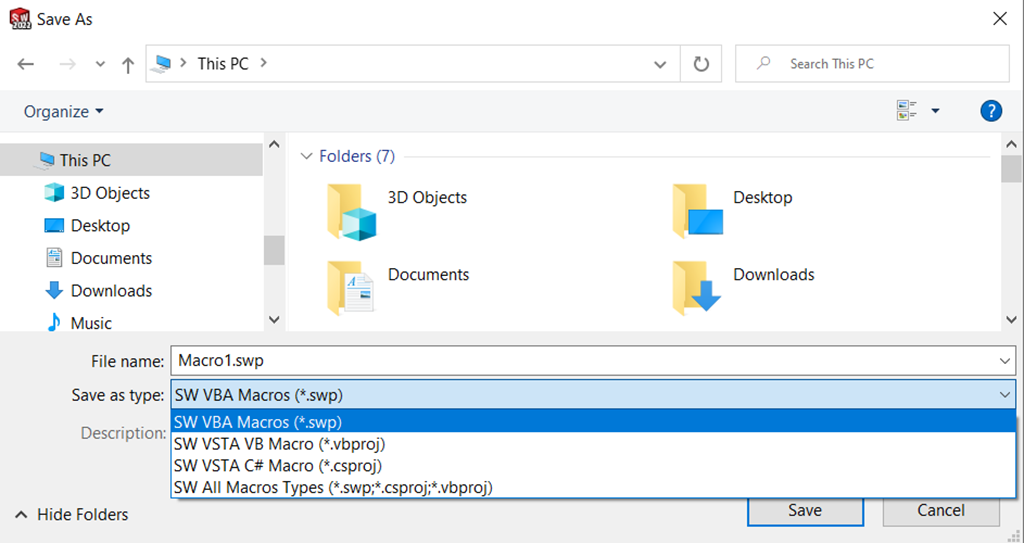
At this point, SOLIDWORKS will ask you to save the macro. Your file type options will depend on whether you have installed the VBA and .NET API extensions.

Saving macro recording
Choose a language and save your macro recording.
Step 2: edit the recorded macro
The SOLIDWORKS macro recorder will record everything that you do, including changing your view and a lot of other clicking around you may not have realized you did. There is a possibility the task you really want to automate either isn’t recorded in the way that you want, or perhaps may not even be recorded at all. Playing back the macro (after you have restored your document to its original state!) will let you know if all your tasks have been recorded.
Even if recording the macro doesn’t give us everything that we need, it still provides a good framework for us to use as a starting point.
Step 3: search for the correct object
Besides the nice framework, there is a chance that the macro recorded will tell us which objects we need and maybe even which properties or methods we need. It’s best to start here, in the code from our recorded macro to see what we have.
Using clues from the recorded code, or a good description of what we’re trying to do, pull up your web search engine. Enter the object/properties/method that you think you need, for example “GetVisibleComponentsInView”, or the description you came up with, for example “Exclude From BOM”, and add “SOLIDWORKS API” and the language that you want to use (VBA, VB.NET or C#.NET) and see what comes up.
For example, you might search
GetVisibleComponentsInView SOLIDWORKS API VB.NET
There’s a good chance that someone has already done what you’re trying to do and there will be something online to help. If you’re lucky, another SOLIDWORKS API user may have a macro that is close to what you are trying to do.
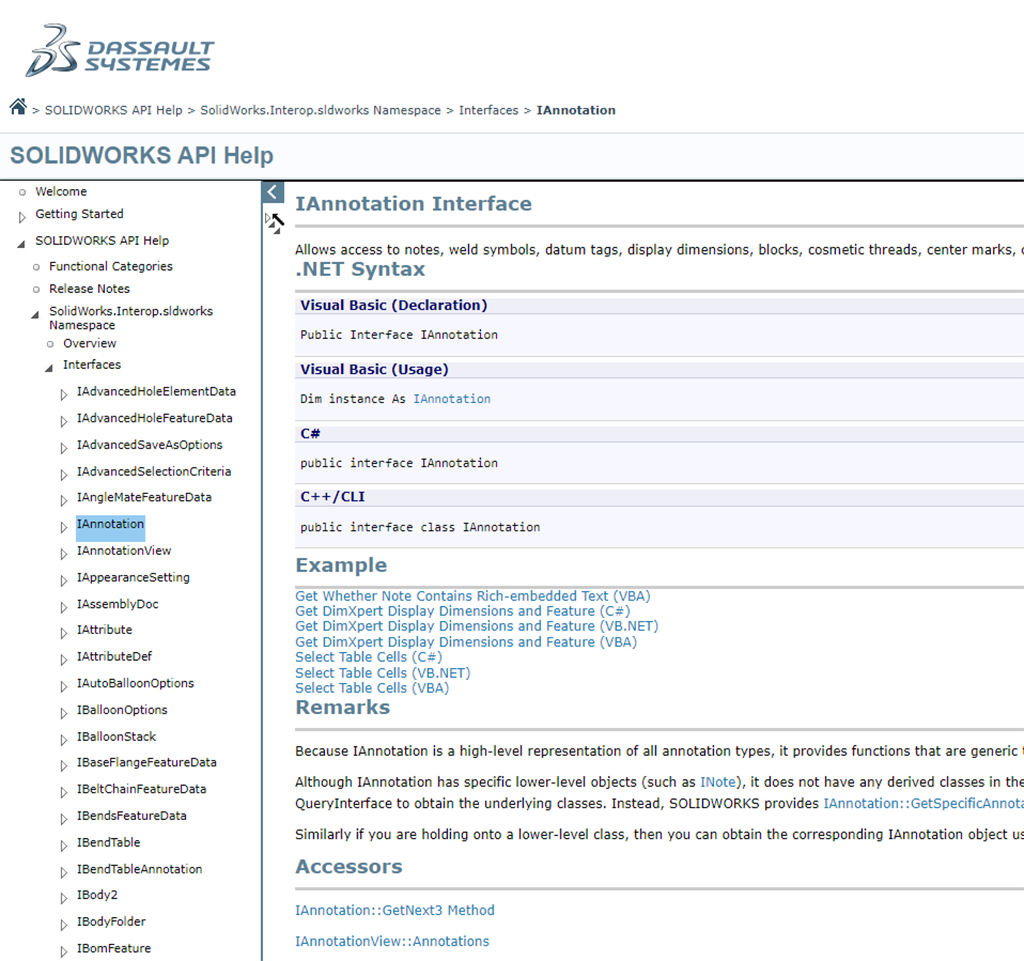
Towards the top of your search results, you will find the SOLIDWORKS online API help. This is going to be your #1 source for information. And since it’s web-based, your favorite search engine should do a great job finding what you need.

SOLIDWORKS API Help
Find help in the SOLIDWORKS API help documentation.
It’s important to note that the SOLIDWORKS API help is version-specific (with an “other versions” field in the upper right corner). This is important as SOLIDWORKS will very frequently deprecate properties and methods and replace them with later numbered version (ex. AddComponent4 and AddComponent5). Whenever possible, it’s always best to use the latest version of a property or method.
Step 4: figure out how to get your object
Once you’ve used the functionality that you’re after to figure out which method or property and therefore what object you need, the fun begins. If you look back at your recorded macro, you will see that you are given a SldWorks object (which represents the SOLIDWORKS application itself) and the ModelDoc2 object that represents your open document. You now have to figure out the path to get the object that you need from those two objects.
There are three main tools that you have in your arsenal to achieve this.
- The first is the series of methods and properties that are on all the objects. When you access a property or method of the SldWorks or ModelDoc2 object, you will typically get back a new object. For example, the GetConfigurationByName method on the ModelDoc2 object will return a Configuration object. Note: In the help file, you will see that often, the SOLIDWORKS API will give you back an “object”. This is just a generic object, and it is up to you to validate and recast that object into the correct type. A quick web search will show you how to do this.You can then use methods and properties on that Configuration object to get other objects and so on, until you can get the object you need.When you look at the “Interface” entry in the help file for each type of object, you will see a section labeled “Accessors”. This section lists all the properties and methods that will return the type of object you looked up. You can use this accessors section in the help to work backwards towards objects that you have.
- The second tool you have at your disposal to get the objects that you need are the selection methods. The SelectionManager (you can get that object from the ModelDoc2.SelectionManager property) gives you access to a series of methods that allow you to leverage any preselected items. You can also add items to the selection set through ModelDoc2.SelectByID2, which allows you to select SOLIDWORKS items by name.
- The third tool that you have is the SOLIDWORKS Feature Manager. In many cases, you will loop through the items in the feature manager, choosing to process them, or not, based on some criteria, or just walking through them until you find the one you were searching for.
Step 5: fill in the rest of the code
Once you’ve identified what object you need and how to get it, you can then write the remaining code. Since objects are the cornerstone of the SOLIDWORKS API, always test to make sure that you have an object before trying to use it.
Using very targeted Try…Catch blocks is highly recommended to prevent any crashes in the event of unexpected happenings during execution. And whether you are using the built-in editor or an outside editor like Visual Studio, leverage the debug tools available and walk through the code, watch variables and values, and test expressions in the immediate window.
Use DriveWorksXpress inside SOLIDWORKS
If you’re looking to automate SOLIDWORKS but don’t have the time to manually create and maintain macros, you could try using DriveWorks design automation for SOLIDWORKS.
If you’ve got SOLIDWORKS, you’ve already got design automation. DriveWorksXpress is a free design automation tool, installed inside every license of SOLIDWORKS. Find it in the tools menu, activate it, and start automating.
Take design automation even further with DriveWorks Solo. Download a 30-day full feature free trial of DriveWorks Solo to see what you could achieve.